Many people find their television’s built-in speakers lacking, especially when watching movies, sports, or playing video games. The thin, often tinny sound can detract significantly from the viewing experience. Connecting external speakers can dramatically improve audio quality, offering richer bass, clearer dialogue, and a more immersive soundstage. However, for those unfamiliar with audio setups, the process of connecting these devices can seem daunting, leading to confusion about cables, ports, and settings. This guide will demystify the process, helping you achieve superior sound for your home entertainment.
Choosing the Right Connection Method
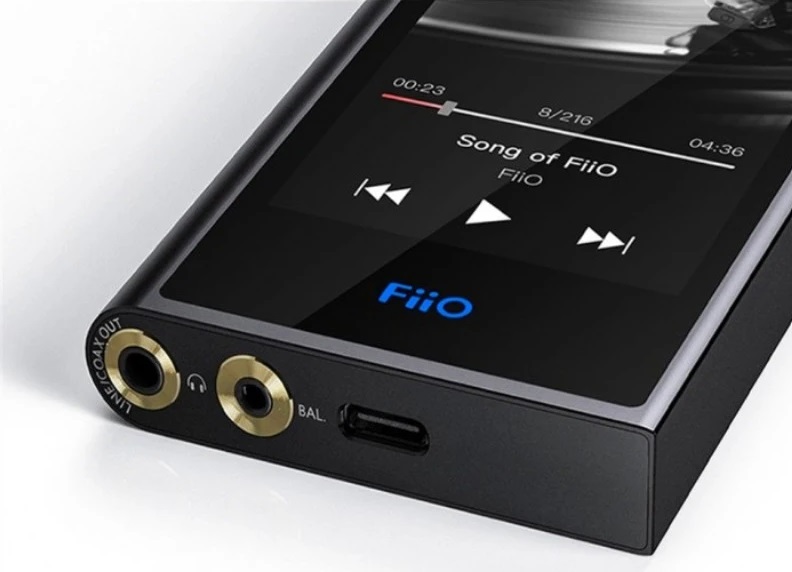
The first step in connecting external speakers is identifying the audio output options on your TV and the input options on your speakers or sound system. Most modern TVs offer several ways to send audio to external devices. The most common and recommended methods are HDMI ARC (Audio Return Channel) and Optical (TOSLINK). Less common, but still available on some older TVs, are RCA stereo outputs (red and white cables) or 3.5mm headphone jacks.
HDMI ARC is generally the best option for simplicity and performance. It allows a single HDMI cable to carry both video from your TV to a soundbar or AV receiver and audio back from the TV to the external device. This means fewer cables and often easier control with your TV remote. To use HDMI ARC, both your TV and your external audio device must support it, and you’ll typically connect to a specific HDMI port labeled “ARC” or “eARC” on your TV. For instance, if you have a soundbar, connecting an HDMI cable from the TV’s HDMI ARC port to the soundbar’s HDMI ARC output is often all it takes.
Optical (TOSLINK) is another excellent digital audio connection that provides high-quality sound. It involves a single fiber optic cable. This is a reliable choice if your TV or audio device doesn’t support HDMI ARC, or if you’re connecting a device like an older soundbar or a stereo amplifier that lacks HDMI inputs. You’ll typically find a square-shaped port on both devices. A key practical consideration for optical cables is to remove the small plastic caps from both ends before plugging them in, as these protect the delicate fiber during shipping.
Step-by-Step Connection Guide
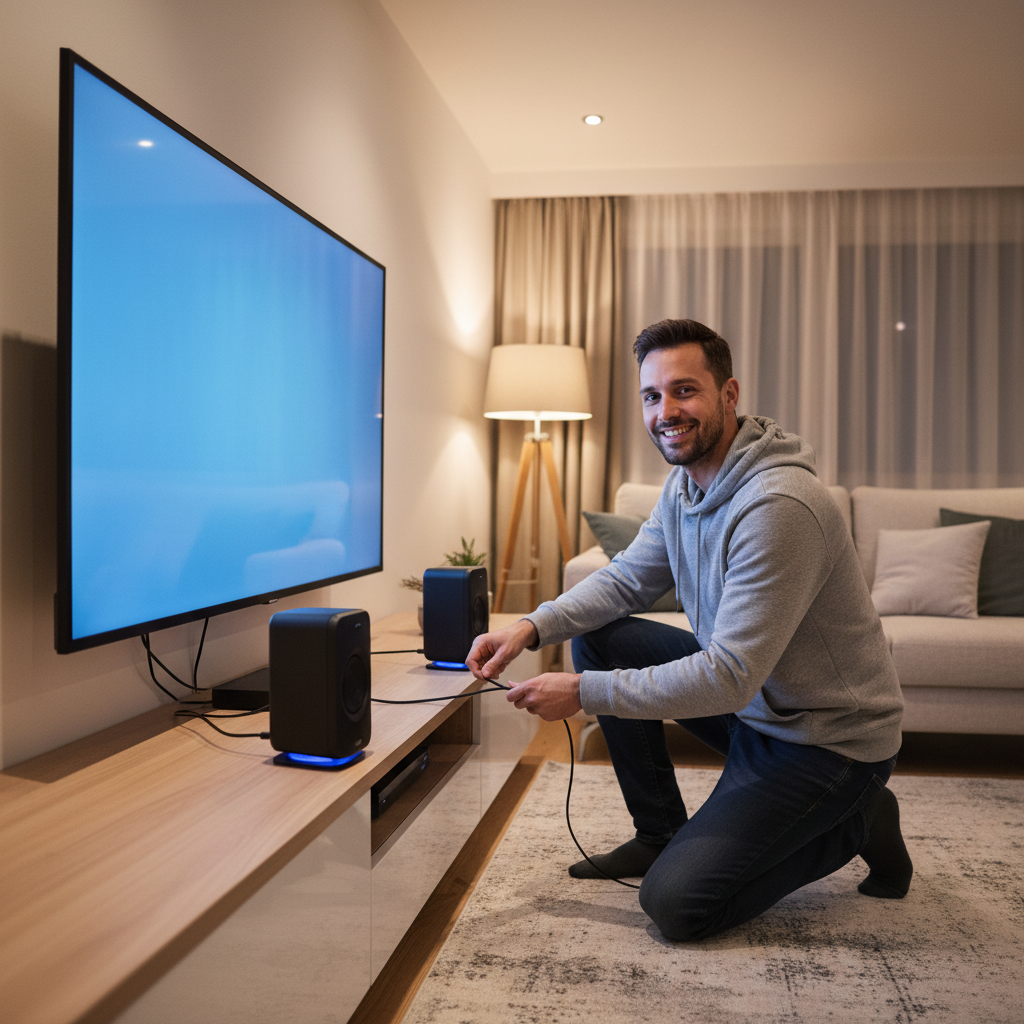
Once you’ve chosen your connection method, the physical setup is straightforward. Let’s use HDMI ARC as the primary example, as it’s increasingly common. First, power off both your TV and your external audio device. Locate the HDMI port labeled “HDMI ARC” or “eARC” on your TV. Next, find the corresponding HDMI ARC output on your soundbar or AV receiver. Connect a high-quality HDMI cable between these two ports. Ensure the cable is securely plugged into both ends. If using an optical cable, connect one end to the TV’s “Optical Out” port and the other to the audio device’s “Optical In” port, remembering to remove any protective caps.
After making the physical connection, power on your external audio device first, then your TV. Now, you’ll need to tell your TV to use the external speakers. Navigate to your TV’s audio settings menu. The exact names of these settings vary between brands (e.g., Samsung, LG, Sony), but you’ll generally look for options like “Sound Output,” “Audio Output,” or “Speakers.” Select the option corresponding to your connection, such as “HDMI ARC,” “External Speakers,” or “Optical.”
Troubleshooting Common Issues
Even with the correct connections, you might encounter issues. One common problem is no sound coming from your external speakers after setup. First, double-check that your TV’s internal speakers are indeed turned off in the audio settings, as some TVs might default to their own speakers even with an external device connected. Ensure the volume on both your TV and your external audio device is turned up and not muted.
Another common issue involves compatibility. While HDMI ARC is widely supported, some older TVs or soundbars might not handle certain audio formats, leading to issues with surround sound. If you’re experiencing distorted or intermittent audio, try adjusting your TV’s digital audio output format. Look for a setting like “Digital Audio Out Format” and try changing it from “Bitstream” to “PCM” (Pulse Code Modulation). PCM is a more universal format and can often resolve compatibility issues, especially for beginners.
Finally, always remember power requirements. Most external audio devices, whether a soundbar or a full amplifier, require their own power source. Ensure they are plugged into a working electrical outlet and powered on. By following these practical steps and keeping an eye on these key considerations, you can easily upgrade your TV’s audio and transform your home entertainment experience.